How to set up a Custom Webhook in Leaf360 so RETR can send records straight into your pipeline, then map the fields and choose who each lead lands on.
This walks you through connecting RETR to Leaf360 with a webhook, so what RETR sends you lands in your pipeline without anyone retyping it.RETR doesn’t have its own card yet. It comes in through the Custom Webhook card, at the bottom of the same Integrations page that has LendingTree. You’ll need to be an admin or super admin to set it up.
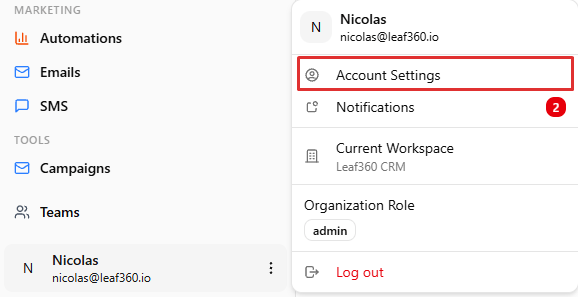
Click your profile at the bottom left of your screen, then Account Settings.
The profile menu at the bottom left, with Account Settings at the top
2
Go to Integrations
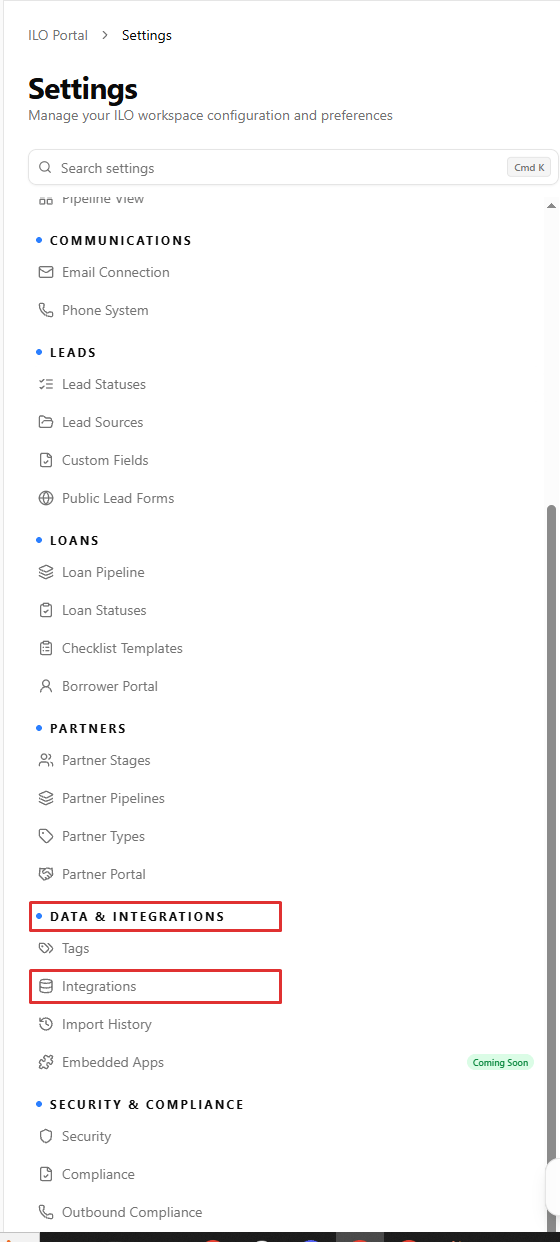
In the settings list, scroll down to Data & Integrations and select Integrations.
Data & Integrations in the settings sidebar, with Integrations selected
3
Open the Custom Webhook card
Scroll to the bottom of the page until you reach the Webhooks section. Go ahead and select Manage on the Custom Webhook card, the one marked Any Source.
4
Add a new webhook
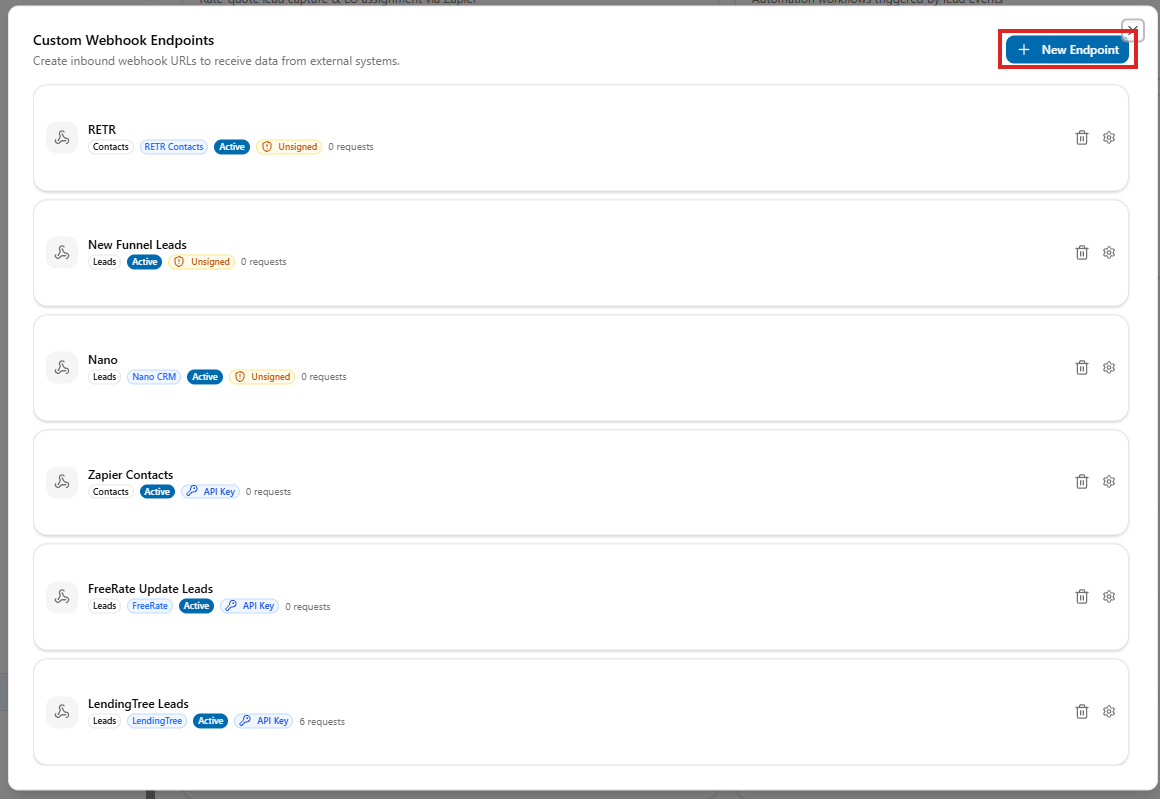
Select + New Endpoint at the top right.
The Custom Webhook Endpoints screen, with New Endpoint boxed in red
5
Fill out the webhook and create it
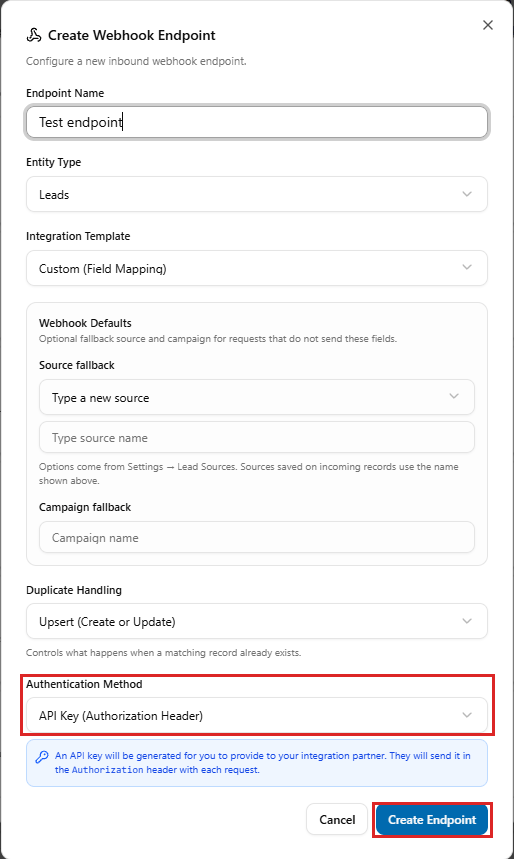
Name the Endpoint Name something like RETR, so that way you can pick it out of the list later.Leave Entity Type on Leads, unless your RETR contact tells you they’re sending something else.Set the Integration Template to Custom (Field Mapping).Under Source fallback, pick or type RETR. That way every record that comes in without a source still shows up as RETR in your reports.Set the Authentication Method to API Key (Authorization Header), then select Create Endpoint.
The Create Webhook Endpoint form, with Custom (Field Mapping) as the template
6
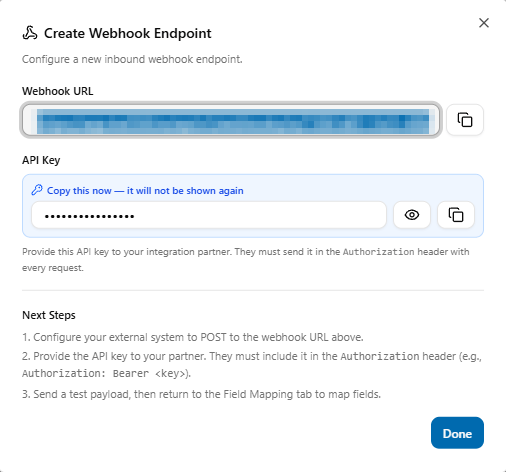
Copy your webhook URL and API key
Leaf360 gives you a Webhook URL and an API Key. Make sure you copy the API key now, because it isn’t shown again.
The finished webhook, with its URL blurred out
7
Send the webhook URL and API key to RETR
Send the Webhook URL and the API Key to your RETR contact. RETR uses them on their side to post your records to that URL, with the API key in the Authorization header.Ask them to send one test record once it’s set up. You’ll need it for the next step.
8
Map the fields from the test record
Once the test record arrives, go back to the RETR webhook and open the Field Mapping tab. Match each field RETR sends to the Leaf360 field it belongs in.Make sure you map email, phone, or both. With neither one mapped, Leaf360 has nothing to recognize a repeat lead by, so the same person comes in twice.
Assignment mapping decides which loan officer gets each lead from RETR. For example, let’s say RETR sends the loan officer’s email on every lead. Match that field to the LO’s email, which is the match that holds up best.When nothing matches, the lead falls to a pond you pick. You can also send every RETR lead straight to a pond instead.You’re going to want to run a dry run before you switch it on, so that way you see where records would land first. Each lead that comes in afterward keeps a note of who it went to.Integration settings covers assignment mapping and list fields in more detail.
Treat the webhook URL and API key like a password. Anyone who has them can send records into your workspace, so don’t post them anywhere public. If you think they got out, go ahead and set up a fresh RETR webhook and send RETR the new URL and key.